

| Program | Type | Cost | Strengths |
|---|---|---|---|
| Fusion 360 | CAD + CAM | Free (hobby) | CAD and CAM integrated, for 3D design |
| FreeCAD | CAD | Free | Open source, powerful, for 3D without a subscription |
| Inkscape | CAD | Free | Vector graphics, simple, for 2D contours |
| SketchUp | CAD | Free (web) | Intuitive, quick to learn, simple 3D models |
| Estlcam | CAM | approx. €60 | Extremely simple, German-language, perfect for beginners |
| VCarve | CAM | approx. €400 | Best V-carving functions for signs, wood, engravings |
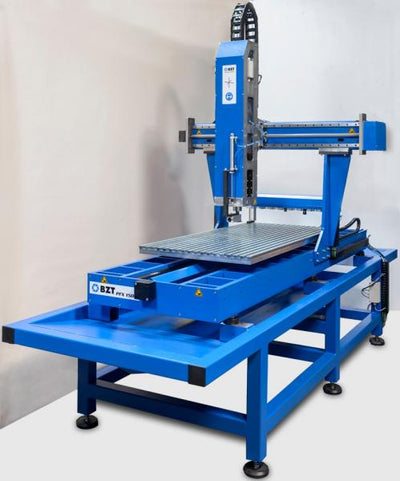
Have you bought your first CNC milling machine, or are you thinking about getting one? Welcome to the world of computer-controlled manufacturing. This guide explains the basics and shows the typical workflow from design to finished workpiece.
What does a CNC milling machine actually do?
CNC stands for Computer Numerical Control (computer-aided numerical control). At its core it is simple:
- A computer sends precise commands to the machine
- The machine moves a rotating tool (the cutter) in three directions
- Material is removed in a controlled way
- A workpiece is created, exactly to your specifications
Unlike a 3D printer (additive manufacturing), a CNC milling machine removes material (subtractive manufacturing). This has advantages: you can machine real materials such as wood, aluminium or plastic, with professional strength and surface quality.
The Workflow: From Idea to Finished Part
Step 1: Create the Design (CAD)
Everything starts with the design on the computer. Depending on the project, you work in 2D or 3D:
2D design (contours, engravings, signs):
- Vector graphics programs such as Inkscape (free) or Adobe Illustrator
- Simple CAD programs such as LibreCAD
- Result: DXF or SVG file
3D design (solid bodies, complex parts):
- CAD programs such as Fusion 360 (free hobby version) or FreeCAD
- Result: STEP, STL or native CAD file
The design describes WHAT is to be made, but not yet HOW.
Step 2: Calculate the Toolpaths (CAM)
CAM software (Computer-Aided Manufacturing) converts your design into machine commands. This is where you define:
- Tools: which cutter for which operation?
- Strategies: contour milling, pocket clearing, engraving, drilling
- Parameters: spindle speed, feed rate, depth of cut (how deep per pass)
- Sequence: which operation comes first?
The result is a G-code file, a list of commands that your machine understands.
Step 3: Prepare the Machine
Before you start the program:
Clamp the material:
- Secure the workpiece firmly (clamps, vacuum, screws)
- Check: will the material withstand the cutting forces?
Insert the cutter:
- Choose the right cutter (as specified in the CAM program)
- Insert it into the collet and tighten it
Set the zero point:
- Where are X=0, Y=0 and Z=0?
- Usually: a corner of the workpiece or its centre
- Z=0 is typically on the workpiece surface
Step 4: Milling
- Load the G-code into the control software
- Check the simulation (does the software show the expected sequence?)
- Optional: dry run without a cutter or with the cutter raised (air cut)
- Start the program
- Watch the first pass: does everything look right?
- If there are problems: emergency stop, and do not reach into the machine
Step 5: Finishing
- Remove the workpiece (carefully, do not bend it)
- Remove burrs (sandpaper, file, deburring knife)
- As required: sanding, polishing, painting
Software for Beginners
CAD Programs
| Program | Cost | Strengths | Who is it for? |
|---|---|---|---|
| Fusion 360 | Free (hobby) | CAD + CAM integrated | 3D design, serious projects |
| FreeCAD | Free | Open source, powerful | 3D, if no subscription is wanted |
| Inkscape | Free | Vector graphics, simple | 2D: logos, lettering, contours |
| SketchUp | Free (web) | Intuitive, quick to learn | Simple 3D models |
CAM Programs
| Program | Cost | Strengths | Who is it for? |
|---|---|---|---|
| Estlcam | approx. €60 | Extremely simple, German-language | Perfect for beginners |
| Fusion 360 | Free (hobby) | CAD + CAM in one | Anyone who designs in 3D |
| VCarve | approx. €400 | Best V-carving functions | Signs, wood, engravings |
Recommendation for beginners: start with Estlcam, which combines CAM and machine control in one program and can be learned in a few hours.
The First Projects
Project 1: Name Plate (Engraving)
- Material: wood or plastic
- Tool: 60° V-groove cutter
- Learning goal: understand the workflow, set the zero point
Project 2: Cutting Out Simple Shapes
- Material: plywood 6 mm
- Tool: end mill 3–4 mm
- Learning goal: contour milling, depth of cut, holding tabs
Project 3: Pocket with Island
- Material: MDF or wood
- Tool: end mill 6 mm
- Learning goal: pocketing strategy, different depths
Important: start with soft, inexpensive materials. Wood and MDF forgive mistakes.
The Most Common Beginner Mistakes
| Mistake | What happens | How to avoid it |
|---|---|---|
| Zero point set incorrectly | Cutter moves into thin air or into the material | Always check, do an air cut first |
| Depth of cut too deep | Tool breaks, motor is overloaded | Start conservatively, increase slowly |
| Material not secure | Workpiece moves, scrap | Clamp properly, mind the forces |
| G-code not simulated | Unexpected movements, crash | Always simulate in the software first |
| No dust extraction | Dust everywhere, health hazard | Always connect the dust extraction |
Basic Equipment to Get Started
- Basic cutter set: end mills 3 mm, 6 mm, 60° V-groove cutter
- Clamping: clamps or T-slot set
- Protective equipment: safety goggles, ear protection
- Dust extraction: at least a workshop vacuum cleaner
- Measuring tools: calliper, steel rule
- Spoilboards: MDF boards as a base
FAQ: Frequently Asked Questions from Beginners
How long does it take to learn CNC?
The basics can be learned in a few days. After two to three weeks of regular practice, most standard projects work out. Real expertise develops over months and years, as with any craft.
Do I need programming skills?
No. Modern CAM software generates the G-code automatically. You do not have to learn a programming language, but you need to understand what the machine is doing.
Can I start with an inexpensive hobby CNC machine?
Yes, but with limitations. Cheap machines have less precision and rigidity. They are enough for first experience with wood and plastic, but as soon as you want to work precisely or mill aluminium, they reach their limits.
Conclusion: Simply Get Started
CNC milling is not rocket science. The most important step is the first one: set up the machine, choose a simple project and get going. Mistakes are part of the learning process.
Our advice: start with simple projects in soft material. Understand the workflow before you take on demanding tasks.
We support you: with every BZT machine you receive extensive documentation. Our support team helps by phone and email, including with beginners’ questions.


0 comments